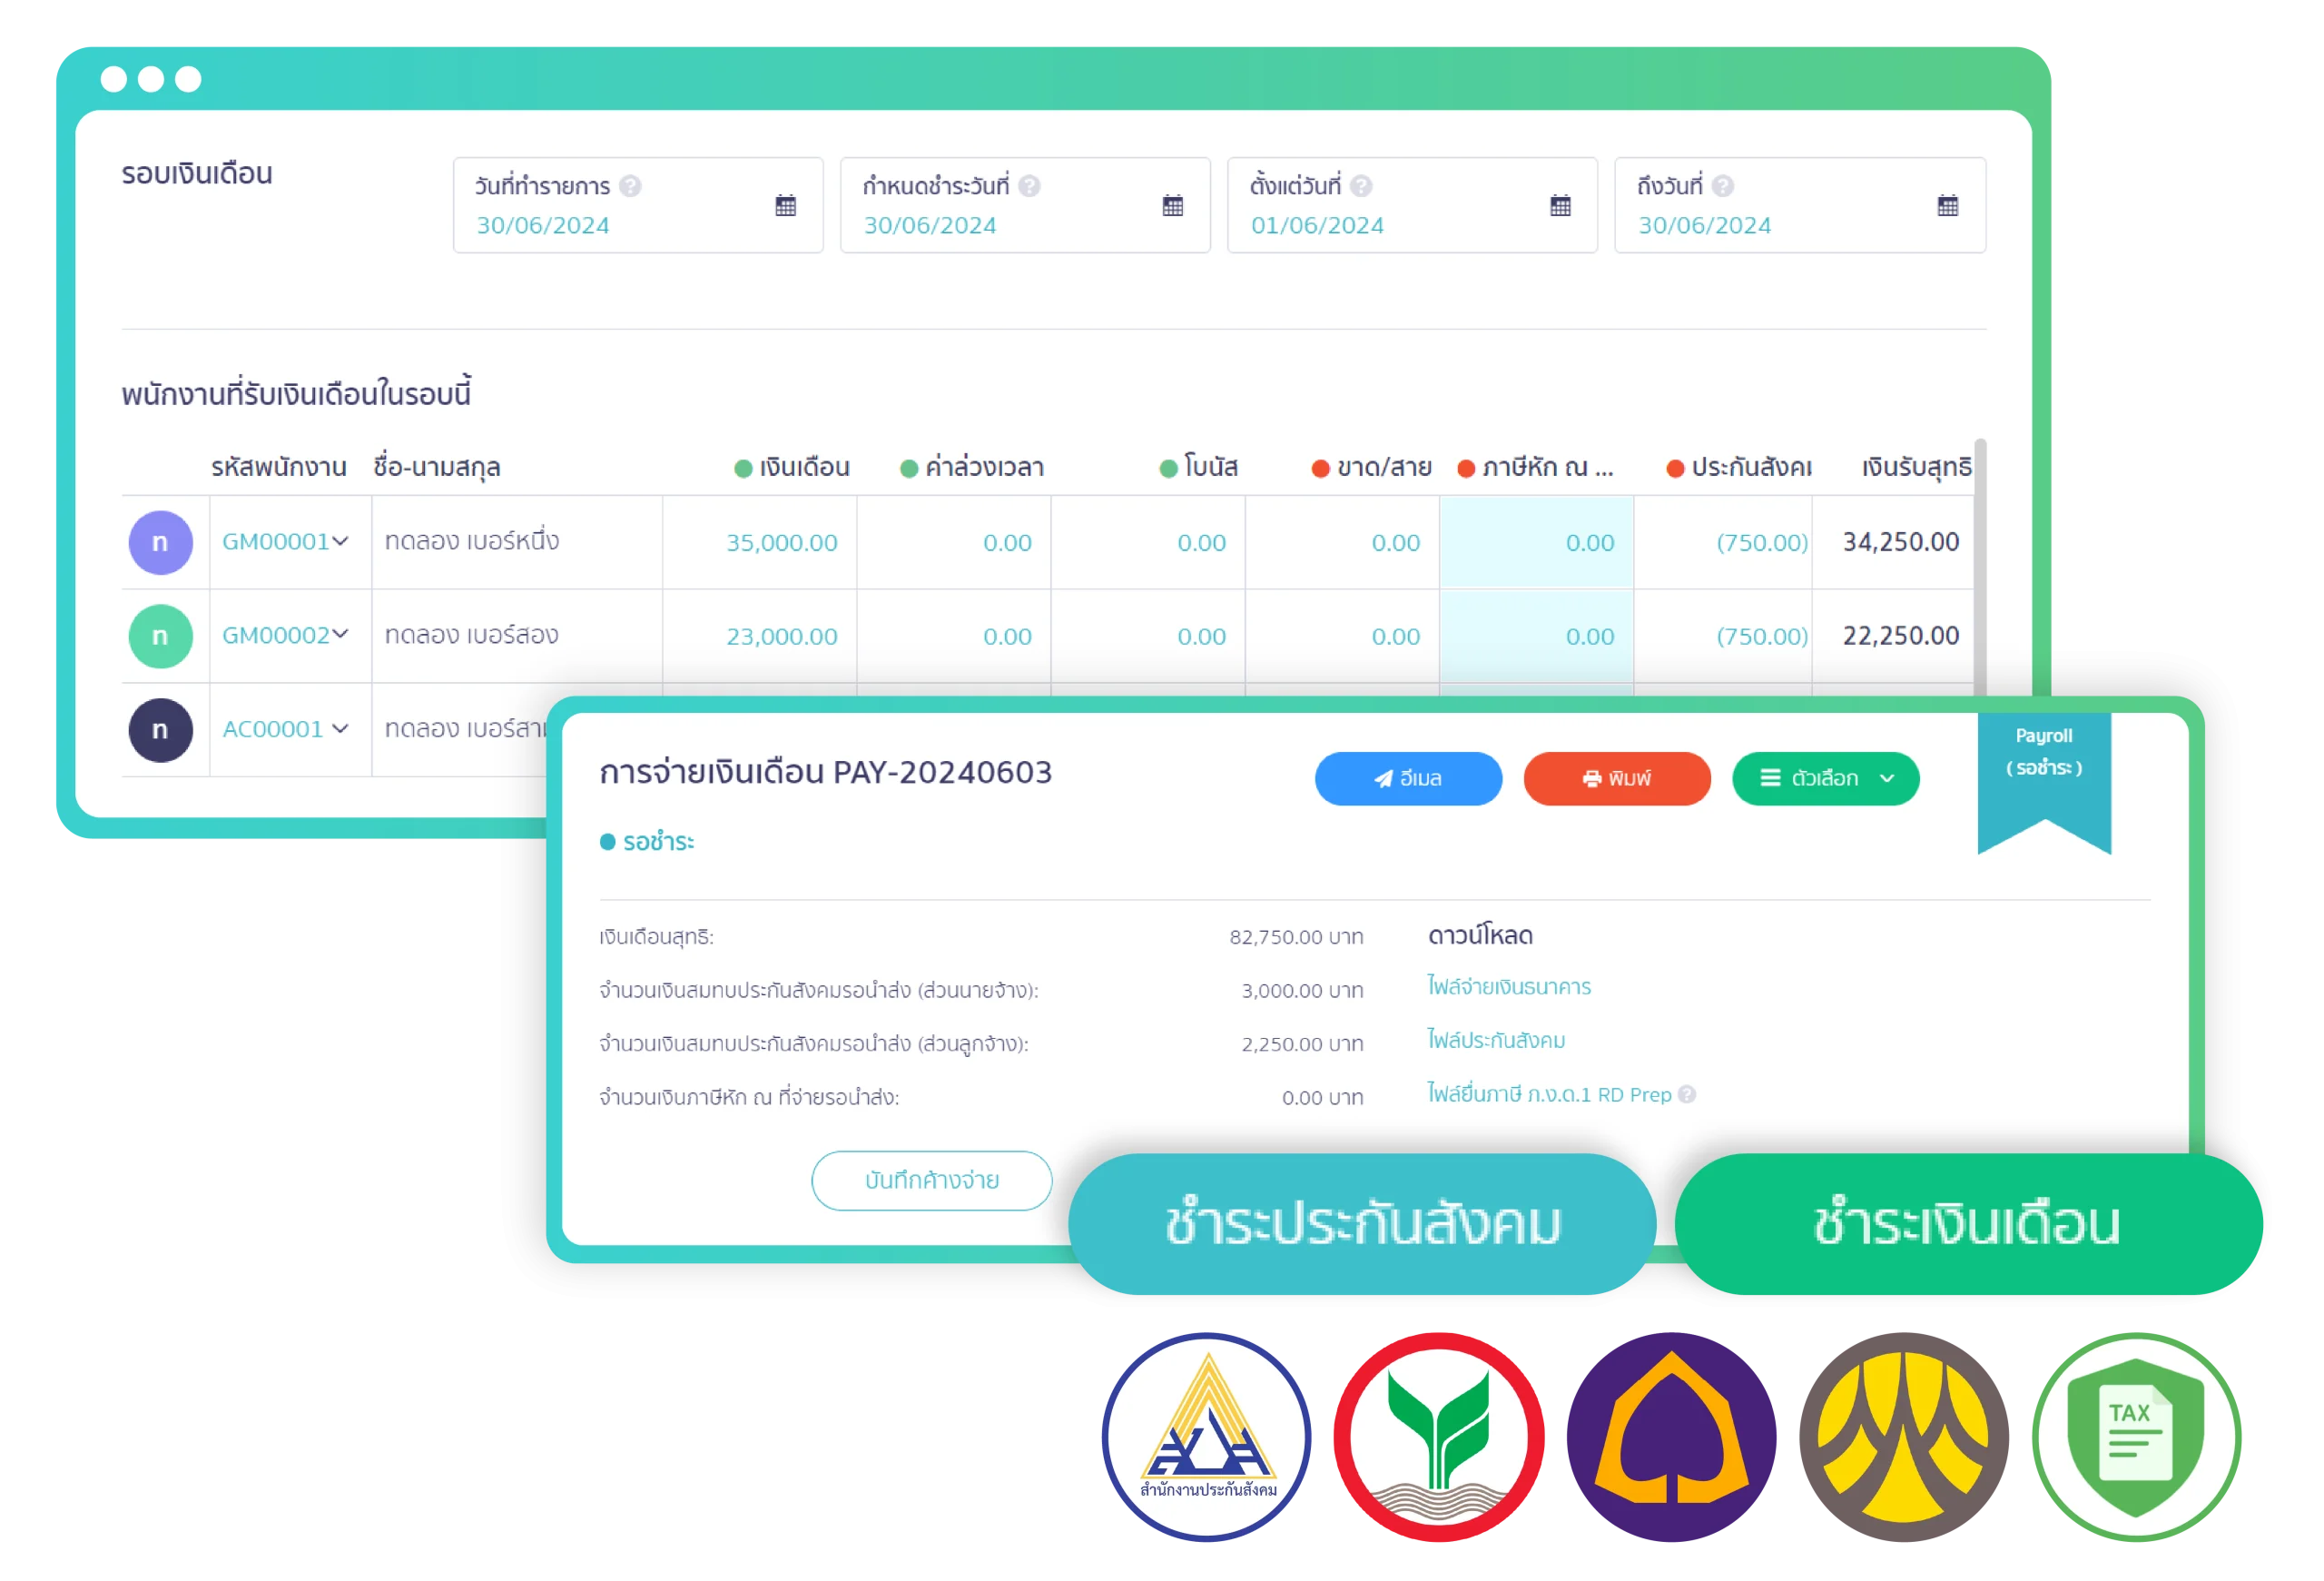
PEAK Payroll สามารถ export ได้ทั้งเงินเดือน ประกันสังคมและภาษี ผ่าน ธนาคาร และ RD-Prep

ตัวช่วยผู้ประกอบการ โปรแกรมเงินเดือนออนไลน์ ทำเงินเดือนพนักงานเป็นระบบ รองรับทุกการเติบโต

โปรแกรมคำนวณเงินเดือนออนไลน์ PEAK Payroll เป็นเครื่องมือที่ช่วยในการจัดการงานบริหารบุคคลในส่วนของเงินเดือนและค่าจ้างหรือผลตอบแทนของ พนักงาน ตั้งแต่ขั้นตอนการนำเข้าข้อมูล การกำหนดสิทธิการเข้าถึงข้อมูลสำหรับ ผู้ดูแลระบบและผู้ใช้งาน การคำนวณเงินเดือนและภาษีไปจนถึงขั้นตอนการจ่าย เงินเดือนและออกรายงานหรือสลิปเงินเดือนต่างๆ ที่เกี่ยวข้อง

24,000 บริษัท
วางใจใช้งาน PEAK

30,000

บริษัท

วางใจใช้งาน PEAK

1,400 พันธมิตรสำนักงานบัญชี

1,400

พันธมิตร

PEAK Family Partner

4  ล้านธุรกรรมต่อเดือน บน PEAK

4

ล้านธุรกรรม/เดือน

ธุรกรรมบน PEAK ต่อเดือน

40,000 ล้าน บาท/เดือน

40,000

ล้าน บาท/เดือน

มูลค่ารายการค้าต่อเดือน

จุดเด่นและฟังก์ชันของ PEAK Payroll โปรแกรมเงินเดือนออนไลน์ที่ใช้งานง่ายที่สุด

สลิปเงินเดือน

สลิปเงินเดือน

สร้างง่ายเพียง 3 ขั้นตอน

ส่งให้พนักงานอัตโนมัติและขอสลิปเงินเดือนเมื่อไหร่ก็ได้

ยื่นประกันสังคมออนไลน์

ยื่นประกันสังคมออนไลน์

สร้างไฟล์พร้อมยื่นประกันสังคม

สามารถนำไปยื่นในระบบ SSO e-service

จ่ายเงินเดือน

จ่ายเงินเดือน

ลดของผิดพลาดในการจ่ายเงินเดือนด้วยไฟล์

ประหยัดเวลาในการจ่ายเงินเดือน

บันทึกบัญชีอัตโนมัติ

บันทึกบัญชีอัตโนมัติ

ลงบัญชีให้อัตโนมัติทุกขั้นตอนในการทำเงินเดือน

ลดเวลาการทำการงาน การทำเงินเดือน

คำนวณภาษีเงินได้บุคคลธรรมดา

คำนวณภาษีเงินได้บุคคลธรรมดา

คำนวณและสร้างภาษีหัก ณ ที่จ่ายได้

สามารถนำข้อมูลไปสร้าง ภ.ง.ด.1, ภ.ง.ด.1ก

สร้างรายการหักเงินหรือเงินได้อย่างอิสระ

สร้างรายการเงินหักหรือเงินได้อย่างอิสระ

สร้างเงินได้พิเศษเพื่อให้ครอบคลุมสวัสดิการ

สร้างเงินหักเพื่อรองรับนโยบาย

PEAK Payroll เหมาะกับใคร?
โปรแกรมเงินเดือนออนไลน์ที่ตอบโจทย์ธุรกิจมากที่สุด

ผู้ประกอบการใช้ PEAK Payroll จัดการเงินเดือนในธุรกิจ SME

เครื่องมือช่วยบริหารต้นทุนเงินเดือนสำหรับผู้ประกอบการ เจ้าของธุรกิจ SME

เห็นภาพรวมเงินเดือนทั้งหมดของบริษัท ทำให้สามารถวางแผนเงินเดือนได้อย่างมีประสิทธิภาพ

ฝ่ายบุคคลและนักบัญชีใช้ PEAK Payroll บริหารเงินเดือนและข้อมูลพนักงาน

ตัวช่วยจัดการเงินเดือน
สำหรับเจ้าหน้าที่ฝ่ายบุคคลและนักบัญชี

โปรแกรมเงินเดือน ลดความซ้ำซ้อนในการทำงาน ประหยัดเวลา สามารถทำเงินเดือนได้ถูกต้องและรวดเร็ว

จ่ายเงินเดือนผ่านโปรแกรมเงินเดือน PEAK Payroll เชื่อมต่อโปรแกรมบัญชีอัตโนมัติ

จ่ายเงินเดือนผ่านโปรแกรมเงินเดือน PEAK Payroll เชื่อมต่อโปรแกรมบัญชีอัตโนมัติ

ลดขั้นตอนในการทำงาน ลดข้อผิดพลาด ข้อมูลถูกต้อง แม่นยำ และรวดเร็ว ครบทุกเรื่องบัญชี ภาษี และประกันสังคม จบในที่เดียว

ราคาเริ่มต้น 1,200 บาท/เดือน โปรแกรมเงินเดือนออนไลน์ PEAK Payroll

บริหารธุรกิจ บัญชี การเงิน
และจัดการเงินเดือนได้ครบวงจร

เริ่มต้นเพียง 1,200 บาท/เดือน

รู้จัก PEAK Payroll โปรแกรมเงินเดือนออนไลน์ ใน 3 นาที

จัดการเงินเดือนได้ง่ายๆ ด้วย โปรแกรมเงินเดือน - PEAK Payroll

คำถามที่พบบ่อยเกี่ยวกับโปรแกรมเงินเดือนออนไลน์ PEAK Payroll

สามารถทำได้ซึ่งบนโปรแกรมเงินเดือน (PEAK Payroll) สามารถสร้างได้ทั้งแบบภาษีรายเดือนและรายปี

โดยแยกเป็น 2 ประเภทดังนี้

  1. ภ.ง.ด 1 เมื่อมีการบันทึกจ่ายเงินเดือน PAY โปรแกรมเงินเดือน (PEAK Payroll) จะสร้างไฟล์ให้อัตโนมัติสำหรับการใช้โอนย้ายบน RD Prep และนำส่งข้อมูลให้กับทางกรมสรรพากรได้
  2. ภ.ง.ด 1ก เมื่อมีการสร้างสรุปจ่ายเงินเดือนประจำปีใน ระบบโปรแกรมเงินเดือน (PEAK Payroll) จึงดึงข้อมูลจากการจ่ายเงินเดือนในแต่เดือนของปีนั้นๆมารวมคำนวนเงินได้ และคิดภาษีรวมทั้งปีให้ ซึ่งง่ายต่อการนำการนำข้อมูลไปยื่นภาษีต่อ

เมื่อใช้โปรแกรมเงินเดือน (PEAK Payroll) เพื่อสร้างข้อมูลเงินเดือน และการชำระเงินเดือน คุณไม่จำเป็นต้องทำการบันทึกค่าใช้จ่ายเพิ่มเติมอีกครั้ง เนื่องจากระบบจะทำการบันทึกบัญชีให้โดยอัตโนมัติในรูปแบบของเอกสารบันทึกรายจ่าย EXP ซึ่งโปรแกรมเงินเดือน (PEAK Payroll) จะช่วยประหยัดเวลาและลดความผิดพลาดในกระบวนการบัญชีของคุณได้อย่างมีประสิทธิภาพ

สำหรับการคำนวนยอดการจ่ายประกันสังคม โปรแกรมเงินเดือน (PEAK Payroll) สามารถตั้งค่าคำนวนได้แบบทั้งกิจการและลงลึกได้ทั้งแบบรายพนักงานในบริษัท

ซึ่งการตั้งค่าประกันสังคมสามารถตั้งค่าได้ทั้งฝั่งอัตราเงินสมทบส่วนของนายจ้าง และ อัตราเงินสมทบส่วนของลูกจ้างเพื่อให้การจ่ายประกันสังคมในแต่ละเดือนเป็นเรื่องง่ายและสะดวกต่อการทำงาน

และที่เป็นจุดเด่นโปรแกรมเงินเดือน (PEAK Payroll) สามารถสร้างไฟล์ประกันสังคมเพื่อนำไปอัปโหลดบนเว็บไซต์ประกันสังคม เพื่อทำจ่ายประกันสังคมได้ด้วย

อ่าน สำหรับวิธีการใช้งานฟังก์ชันเกี่ยวกับประกันสังคม เพิ่มเติมที่นี่
อ่าน วิธีการสร้างไฟล์ประกันสังคมเพื่อนำไปจ่ายบนเว็บไซต์ประกันสังคม เพิ่มเติมที่นี่

สามารถทำได้ โดยจะออกสลิปเงินเดือนและสามารถกดส่งสลิปเงินเดือนทาง Email ให้กับพนักงานในบริษัทได้เมื่อมีการบันทึกจ่ายเงินเดือน บนโปรแกรมเงินเดือน (PEAK Payroll)

อ่าน คู่มือการออกสลิปเงินเดือน เพิ่มเติมนี่ที่
อ่าน คู่มือการส่งสลิปเงินเดือนทาง Email เพิ่มเติมที่นี่
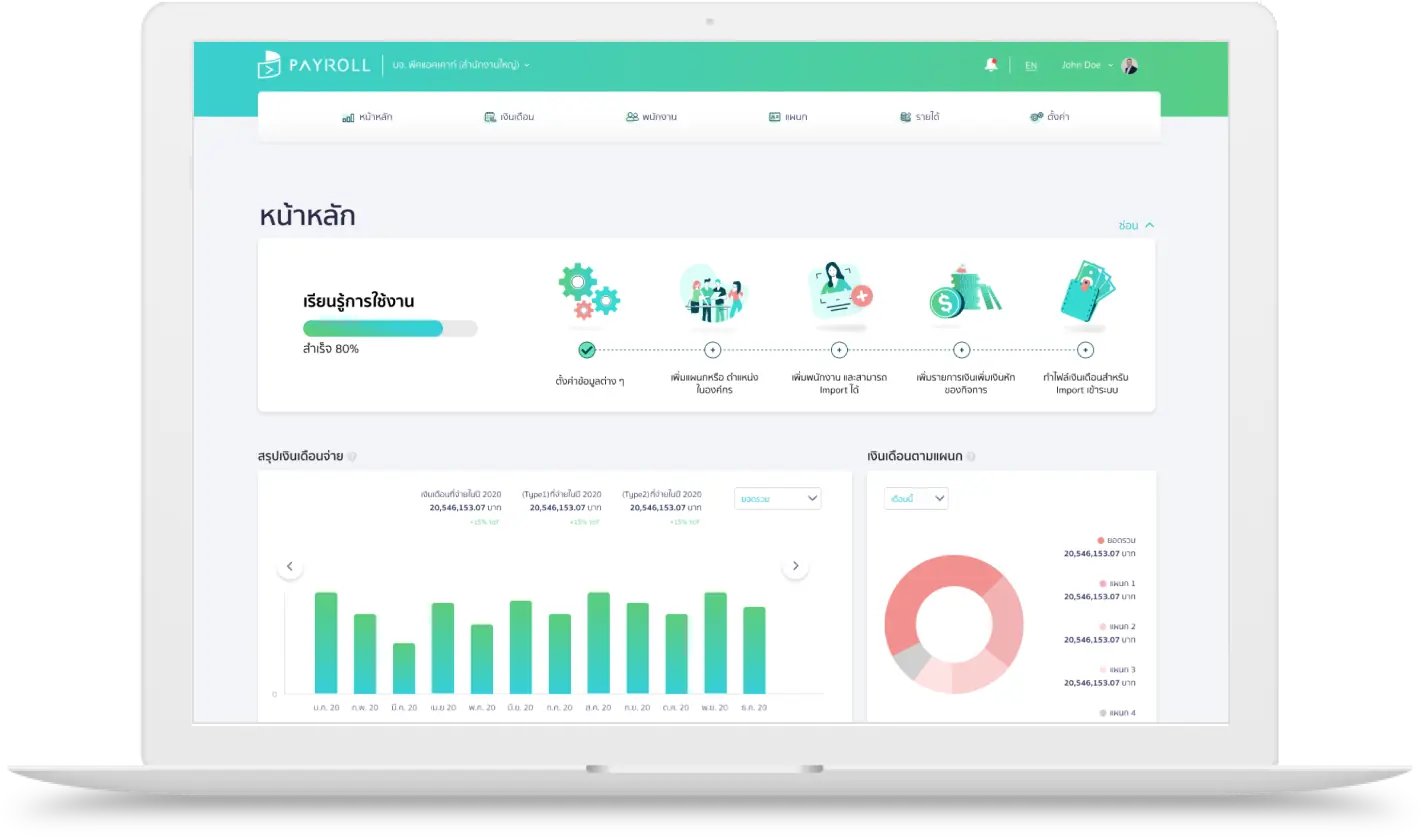
ผลิตภัณฑ์ของ PEAK

PEAK Account
โปรแกรมบัญชีออนไลน์

ดูรายละเอียดเพิ่มเติม

PEAK Payroll
โปรแกรมเงินเดือนออนไลน์

ดูรายละเอียดเพิ่มเติม

PEAK Board
โปรแกรมวิเคราะห์ธุรกิจ

ดูรายละเอียดเพิ่มเติม

PEAK Asset
โปรแกรมบริหารจัดการสินทรัพย์

ดูรายละเอียดเพิ่มเติม

PEAK Tax
โปรแกรมการจัดการภาษีออนไลน์

ดูรายละเอียดเพิ่มเติม

Line @PEAKConnect
ใช้งานโปรแกรมผ่านไลน์

ดูรายละเอียดเพิ่มเติม

บทความน่ารู้

PEAK Account

7

min

Update Function 11/12/2024

PEAK with the new function designed to enhance efficiency. ✨ 1. Developed the bank reconciliation function to enhance work efficiency and convenience. 1.1 Improved the display of information on the reconciliation page for better readability. 📢 For businesses using the bank reconciliation function, the system has been updated to enhance the display on the reconciliation page, allowing more information to be shown. The updates include: These improvements aim to boost efficiency and make data review more convenient and faster. 1.2 Ability to create new transactions directly from the reconciliation page. 📢 For businesses using the Premium, PRO Plus, and Trial packages, that perform bank reconciliation and need to make transactions, the system now offers additional options to create transactions directly from each deposit/payment entry. Users can click the options button (three dots) or right-click to perform actions immediately through the bank reconciliation page. The available options include: These features are designed to streamline document management and enhance efficiency in bank reconciliation processes. ✨ 2. Added the PEAK Payroll system to streamline payroll processing and reduce manual steps. 2.1 Add new employees directly on the payroll processing page. 📢 The system now includes an “Add New Employee” button on the payroll processing page. Users can conveniently add new employee information directly from the payroll page, streamlining the workflow and improving efficiency. 2.2 Adjust accumulated income calculations to be based on a cash basis. 📢 The system now adjusts the calculation of accumulated income displayed on payroll slips. It will calculate based only on payroll payment documents with a “Paid” status. Additionally, a notification has been added to the payroll payment page to inform users about the new calculation criteria. This enhancement ensures that the information is accurate and aligns more closely with the cash-based principle. Example of a Notification Regarding Cumulative Income Calculation. 2.3 Add the option “Income Type 40(2)” on the additional income adjustment page and display it in Form 50 Bis on the payroll summary page. 📢 The system now includes an option for income type 40(2) on the Additional Income page. Users can edit each additional income item by specifying whether it falls under income type 40(1) or 40(2). When generating the year-end payroll summary, the system will automatically pull the data and display income type 40(2) items on the Withholding Tax Certificate (Form 50 Bis) page. This enhancement ensures greater accuracy in managing tax data. Example of Form 50 Bis with income type 40(2). 2.4 Support displaying “Income Type 40(2)” in the tax submission file. (PND.1 Text File) 📢 The system now updates the tax filing Text File for P.N.D. 1 to support income type 40(2) in addition to 40(1). This improvement enables users to file taxes more conveniently and accurately by including both income types in the submission. Example of a Text File with income type 40(2). ✨ 3. Developed the functionality to apply deposit receipts/payments for settling more than one document. 📢 For businesses using deposit receipts/payments, the system now supports applying these documents to offset payment/receipt transactions. Users can choose to apply deposit receipts/payments in two ways: When selecting deposit receipts/payments for offsetting, users can modify the amount and related tax values. On the deposit details page, the system will display the number of deposit documents applied for offsetting, the applied amounts, and the remaining deposit balance for future use. For example, if a deposit receipt is issued and the customer makes partial payments in multiple installments, the system will accurately track these payments.This feature enhances convenience and flexibility in managing deposit receipts and offsetting payments, ensuring efficient financial operations. Example of Deposit Information Display on the Document Page. ✨ 4. Improved the Product/Service Import functionality to simplify data management. 4.1 Add the option “Update Existing Products” to modify current data. 📢 For businesses that need to modify product/service information already in the system, you can now import the “Edit Existing Products” file. This feature allows users to update product/service information efficiently, and the system will automatically update the records. The imported file consists of 3 Sheets: For the products/services you modify, the Product ID must match an existing ID in the system. If a product/service ID does not exist in the system, the file import will fail. This ensures accurate and seamless product/service data management, helping reduce errors and maintain operational efficiency. Example of the “Edit Existing Products” Import File. 4.2 Add new columns in the product/service import file to align with system data requirements. 📢 The system now clarifies the descriptions and required information for importing files, ensuring better accuracy and transparency. Additionally, the product/service import file now includes an SKU column for integration with popular platforms like Shopee, Lazada, and TikTok Shop. If you input an SKU from these platforms—even if it hasn’t yet been configured—the system will automatically activate the SKU upon import. To ensure smooth and efficient data management, the system limits imports to 1,000 items per batch. This helps prevent errors and ensures reliable handling of large datasets. ✨ 5. Improved the Contact Import functionality to make data management more convenient. 5.1 Add the option “Update Existing Contacts” to modify current data. 📢 For businesses that need to modify contact information already in the system, you can now use the “Edit Existing Contacts” import file. This allows users to efficiently update contact details, and the system will automatically refresh the contact information. The imported file is divided into 3 sheets: Contact ID: Must match an existing ID in the system for updates to work correctly. If the contact ID does not exist, the system will reject the file import. By requiring matching IDs, this ensures accurate and seamless management of contact information while minimizing errors. Example of the “Edit Existing Contacts” Import File. 5.2 Add new columns in the contact import file to align with system data requirements. 📢 The system now clarifies descriptions and specifies the required information for importing files to ensure better accuracy. Additionally, the import file for contacts now includes new columns for Contact […]

ฟังก์ชันใหม่แนะนำการใช้งาน

อัปเดตฟังก์ชัน PEAK 11/12/2024

PEAK Account

14

min

อัปเดตฟังก์ชัน PEAK 11/12/2024

เอาใจผู้ใช้งานโปรแกรม PEAK ด้วยฟังก์ชันใหม่ที่ช่วยให้การทำงานมีประสิทธิภาพมากขึ้น ✨ 1. พัฒนาฟังก์ชันการกระทบยอดธนาคาร เพื่อเพิ่มความสะดวกในการทำงาน 1.1 ปรับการแสดงข้อมูลที่หน้ากระทบยอดให้อ่านง่ายมากขึ้น 📢สำหรับกิจการที่ใช้ฟังก์ชันกระทบยอดธนาคาร ระบบมีการปรับปรุงการแสดงข้อมูลหน้ากระทบยอดใหม่ให้แสดงข้อมูลได้มากขึ้น โดยระบบมีการปรับการแสดงข้อมูล ดังนี้ เพื่อเพิ่มประสิทธิภาพการทำงานและช่วยให้การตรวจสอบข้อมูลสะดวกและรวดเร็วยิ่งขึ้น 1.2 สร้างรายการใหม่ได้จากหน้ากระทบยอดธนาคาร 📢สำหรับกิจการแพ็กเกจ Premium, PRO Plus และ Trial ที่กระทบยอดธนาคารและต้องการทำรายการต่างๆ ระบบเพิ่มตัวเลือกการสร้างรายการในแต่ละรายการเงินเข้า-เงินออก กดปุ่มตัวเลือก (จุด 3 จุด) หรือคลิกเมาส์ขวาเพื่อทำรายการได้ทันทีผ่านหน้ากระทบยอดธนาคาร โดยมีรายการที่สามารถทำได้ ดังนี้ เพื่อช่วยลดขั้นตอนในการจัดการเอกสารและเพิ่มความสะดวกรวดเร็วในการกระทบยอดธนาคาร ✨ 2. เพิ่มฟังก์ชันระบบเงินเดือน PEAK Payroll ช่วยลดขั้นตอนในการทำข้อมูลเงินเดือน 2.1 เพิ่มปุ่ม “พนักงานใหม่” ได้ที่หน้าทำจ่ายเงินเดือน 📢ระบบเพิ่มปุ่ม “เพิ่มพนักงานใหม่” หน้าการทำจ่ายเงินเดือน ผู้ใช้งานสามารถเพิ่มข้อมูลพนักงานใหม่ได้ทันทีจากหน้าทำจ่ายเงินเดือน ช่วยเพิ่มความสะดวกรวดเร็วในการทำงาน 2.2 ปรับการคำนวณเงินได้สะสมในสลิปเงินเดือนให้อิงตามเกณฑ์เงินสด 📢ระบบปรับการคำนวณเงินได้สะสมที่แสดงในสลิปเงินเดือน โดยจะคำนวณจากเอกสารทำจ่ายเงินเดือนที่มีสถานะ “ชำระเงิน” แล้วเท่านั้น โดยที่หน้าทำจ่ายเงินเดือนระบบจะเพิ่มข้อความแจ้งเตือนเกี่ยวกับการคำนวณเงินได้สะสมตามหลักเกณฑ์ใหม่ เพื่อช่วยให้ข้อมูลมีความถูกต้องและสอดคล้องกับเกณฑ์เงินสดมากยิ่งขึ้น ตัวอย่างข้อความแจ้งเตือนเกี่ยวกับการคำนวณเงินได้สะสม 2.3 เพิ่มตัวเลือก “ประเภทเงินได้ 40(2)” หน้าการแก้ไขเงินเพิ่มและแสดงประเภทเงินได้ 40(2) ในเอกสารใบ 50 ทวิหน้าสรุปจ่ายเงินเดือน 📢ระบบเพิ่มตัวเลือกประเภทเงินได้ 40(2) ที่หน้าเงินเพิ่ม ผู้ใช้งานสามารถแก้ไขได้ที่เงินเพิ่มในแต่ละรายการ โดยระบุว่าเงินเพิ่มนั้นต้องการเป็นเงินได้ประเภท 40(1) หรือ 40(2) เมื่อทำสรุปจ่ายเงินเดือนสิ้นปี ระบบจะดึงข้อมูลและแสดงรายการประเภทเงินได้ 40(2) ที่หน้าหนังสือรับรองหัก ณ ที่จ่าย (ใบ 50 ทวิ) ให้อัตโนมัติ ช่วยให้การจัดการข้อมูลภาษีมีความแม่นยำมากยิ่งขึ้น ตัวอย่างใบ 50 ทวิ กรณีมีประเภทเงินได้ 40(2) 2.4 เพิ่มการรองรับการแสดงประเภทเงินได้ 40(2) ในไฟล์ยื่นภาษี ภ.ง.ด.1 (Text File) 📢ระบบปรับให้ Text File ยื่นภาษีของ ภ.ง.ด.1 รองรับการแสดงยอดเงินได้จากประเภท 40(2) เพิ่มเติมจาก 40(1) ช่วยให้ผู้ใช้งานสามารถยื่นภาษีได้สะดวกมากยิ่งขึ้น ตัวอย่าง Text File ที่มีประเภทเงินได้ 40(2) ✨ 3. พัฒนาฟังก์ชันการนำใบรับเงินมัดจำ/ใบจ่ายเงินมัดจำไปตัดรับ/จ่ายชำระหน้าเอกสารได้มากกว่า 1 เอกสาร 📢สำหรับกิจการที่ใช้ใบรับมัดจำ/ใบจ่ายมัดจำ ระบบเพิ่มฟังก์ชันการนำใบรับมัดจำ/ใบจ่ายมัดจำไปตัดรับ/จ่ายชำระเอกสาร โดยการเลือกนำใบรับมัดจำ/ใบจ่ายมัดจำไปตัดรับ/จ่ายชำระ สามารถทำได้ 2 แบบ ในการเลือกเอกสารใบรับมัดจำ/ใบจ่ายมัดจำมาตัดรับ/จ่ายชำระ ผู้ใช้งานสามารถแก้ไขยอดเงิน รวมถึงมูลค่าภาษีที่เกี่ยวข้องได้ โดยที่หน้าข้อมูลใบมัดจำ ระบบจะแสดงจำนวนเอกสารใบมัดจำที่นำมาตัดชำระเงิน พร้อมทั้งแสดงข้อมูลการนำใบมัดจำไปรับ/จ่ายชำระ ครั้งละกี่บาท และแสดงยอดมูลค่าคงเหลือของเงินมัดจำค้างตัด เช่น กรณีออกใบรับเงินมัด 1 ฉบับ และลูกค้าได้มีการแบ่งจ่ายชำระเงินมัดจำหลายๆงวด เป็นต้น ช่วยให้ผู้ใช้งานสามารถจัดการใบมัดจำและการตัดชำระได้สะดวกและยืดหยุ่นมากขึ้น  ตัวอย่างการแสดงข้อมูลเงินมัดจำหน้าเอกสาร ✨ 4. เพิ่มฟังก์ชันการนำเข้าสินค้า/บริการ (Import Product/Service) 4.1 เพิ่มตัวเลือก “แก้ไขสินค้าเดิม” สำหรับอัปเดตข้อมูลที่มีอยู่ 📢สำหรับกิจการที่ต้องการแก้ไขข้อมูลสินค้า/บริการที่มีอยู่ในระบบ สามารถนำเข้าไฟล์ “แก้ไขสินค้าเดิม” โดยผู้ใช้งานสามารถแก้ไขหรืออัปเดตข้อมูลสินค้า/บริการได้จากไฟล์ “แก้ไขสินค้าเดิม” และนำเข้าไฟล์ ระบบจะอัปเดตข้อมูลสินค้าให้อัตโนมัติ ซึ่งในไฟล์นำเข้าจะแบ่งออกเป็น 3 Sheet ดังนี้ โดยข้อมูลสินค้า/บริการที่แก้ไขนั้น รหัสสินค้าจะต้องเป็นรหัสที่มีอยู่ในระบบเท่านั้น หากไม่มีข้อมูลดังกล่าว จะไม่สามารถนำเข้าไฟล์ได้ ซึ่งจะช่วยลดความผิดพลาดและเพิ่มความมั่นใจในการจัดการข้อมูลสินค้าเดิมได้อย่างราบรื่นและแม่นยำ ตัวอย่างไฟล์การแก้ไขสินค้าเดิม 4.2 เพิ่มคอลัมน์ในไฟล์นำเข้าสินค้า/บริการ เพื่อให้ครอบคลุมข้อมูลในระบบ 📢ระบบปรับคำอธิบายและระบุข้อมูลที่จำเป็นในการนำเข้าไฟล์ให้มีความชัดเจนมากขึ้น นอกจากนี้ในไฟล์นำเข้าสินค้า/บริการ ระบบได้มีการเพิ่มคอลัมน์หมายเลข SKU จากแพลตฟอร์ม Shopee, Lazada, และ TikTok Shop หากมีการใส่ข้อมูล SKU เข้าไปแม้ว่ายังไม่ได้ตั้งค่าเปิดใช้งาน เมื่อนำเข้าระบบ ระบบจะเปิดการใช้งาน SKU ให้อัตโนมัติ โดยในการนำเข้าสินค้า/บริการ ระบบจำกัดรายการนำเข้า 1,000 รายการต่อครั้ง เพื่อป้องกันข้อผิดพลาดและรองรับการจัดการข้อมูลขนาดใหญ่  ✨ 5. เพิ่มฟังก์ชันการนำเข้าผู้ติดต่อไฟล์ (Import Contact) 5.1 เพิ่มตัวเลือก “แก้ไขผู้ติดต่อเดิม” สำหรับอัปเดตข้อมูลที่มีอยู่ 📢สำหรับกิจการที่ต้องการแก้ไขข้อมูลผู้ติดต่อที่มีอยู่ในระบบ สามารถนำเข้าไฟล์ “แก้ไขผู้ติดต่อเดิม” โดยผู้ใช้งานสามารถแก้ไขหรืออัปเดตข้อมูลผู้ติดต่อได้จากไฟล์ “แก้ไขผู้ติดต่อเดิม” และนำเข้าไฟล์ ระบบจะอัปเดตข้อมูลผู้ติดต่อให้อัตโนมัติ ซึ่งในไฟล์นำเข้าจะแบ่งออกเป็น 3 Sheet ดังนี้ โดยข้อมูลผู้ติดต่อที่แก้ไขนั้น รหัสผู้ติดต่อจะต้องเป็นรหัสที่มีอยู่ในระบบเท่านั้น หากไม่มีข้อมูลดังกล่าว จะไม่สามารถนำเข้าไฟล์ได้ ซึ่งจะช่วยลดความผิดพลาดและเพิ่มความมั่นใจในการจัดการข้อมูลผู้ติดต่อเดิมได้อย่างราบรื่นและแม่นยำ ตัวอย่างไฟล์การแก้ไขผู้ติดต่อเดิม 5.2 เพิ่มคอลัมน์ในไฟล์นำเข้าผู้ติดต่อ เพื่อให้ครอบคลุมข้อมูลในระบบ 📢ระบบปรับคำอธิบายและระบุข้อมูลที่จำเป็นในการนำเข้าไฟล์ให้มีความชัดเจนมากขึ้น นอกจากนี้ในไฟล์นำเข้าผู้ติดต่อ ระบบได้มีการเพิ่มคอลัมน์ให้ระบุประเภทผู้ติดต่อ, สัญชาติ, ข้อมูลที่อยู่จัดส่งเอกสาร, ครบกำหนดชำระ, บุคคลที่ติดต่อได้หลายคน และเพิ่มกลุ่มผู้ติดต่อได้ หากนำเข้าผู้ติดต่อเกิดข้อผิดพลาด กรณีรายชื่อซ้ำ ระบบจะทำการแจ้งเตือนให้ทันที ในการนำเข้าผู้ติดต่อ ระบบจำกัดรายการนำเข้า 1,000 รายการต่อครั้ง ช่วยลดข้อจำกัดและเพิ่มความสะดวกให้กับผู้ใช้งาน ✨ 6. เพิ่มความยืดหยุ่นในการตั้งราคาโดยกำหนดราคาสินค้า/บริการได้สูงสุด 10 ราคา 📢สำหรับธุรกิจ E-commerce ที่ต้องการจัดการราคาซื้อ-ขายหลายรายการ ระบบเพิ่มการรองรับระบุราคาซื้อ-ขายได้มากขึ้นในหน้าแต่ละสินค้า/บริการ โดยรองรับการเพิ่มรายการได้สูงสุด 10 ราคา ช่วยเพิ่มความสะดวกให้กับผู้ใช้งานในการจัดราคาและทำงานได้สะดวกมากขึ้น ✨ 7. รองรับการชำระเงินผ่าน xplORe Wallet เพื่อเพิ่มความสะดวกในการรับชำระเงิน 📢 สำหรับทุกกิจการ ระบบเพิ่มการรองรับช่องทางการเงิน xplORe Wallet เพื่อรองรับช่องทางการเงินที่หลากหลายมากขึ้น ขอขอบคุณข้อเสนอแนะ จากคุณPrapatsara, บริษัท คงคาแมนูแฟคเจอร์เรอร์ จำกัด

ฟังก์ชันใหม่แนะนำการใช้งาน

3 ขั้นตอนในการจัดทำงบประมาณ

จักรพงษ์

9

min

3 ขั้นตอนพื้นฐานในการจัดทำงบประมาณ

คุณเคยทำธุรกิจไปอย่างไรเป้าหมายไหม? ทำไปเรื่อยๆ รายได้เติบโตขึ้นก็ดีใจ รายได้ลดลงก็เสียใจแต่ธุรกิจก็ยังไปต่อได้ คำถาม คือ ธุรกิจโตแค่ไหนที่เราจะถือว่าปีนั้นประสบความสำเร็จหรือทำได้ตามเป้าหมาย หรือรายได้ลดลงแค่ไหนที่ถือว่าธุรกิจอยู่ในภาวะเสี่ยง คำถามเหล่านี้สามารถตอบได้ด้วยการกำหนดตัวเลขหนึ่งขึ้นมาเพื่อเป็นเป้าหมายที่จะต้องบรรลุให้ได้ในปีนั้น เช่น รายได้ปีนี้ต้องมากกว่าปีที่แล้ว 200% ถ้าเราทำได้ก็ถือว่าบรรลุเป้าหมายขององค์กรและยังสามารถใช้เป็น KPI ของฝ่ายที่เกี่ยวข้องกับการสร้างรายได้ได้ เช่น แผนกขาย แผนกหาลูกค้า เป็นต้น ที่เราพูดกันไปข้างต้นไม่ได้มีแค่มิติในมุมของรายได้ แต่ยังสามารถประยุกต์ใช้กับรายจ่ายได้เช่นกัน รายจ่ายปีนี้ต้องน้อยกว่าปีที่แล้ว หรือให้เพิ่มขึ้นได้ตามสัดส่วนของยอดขาย ถ้ารายจ่ายที่เกิดขึ้นจริงเกินกว่าเกณฑ์ที่กำหนด ถือว่าแผนกที่เกี่ยวข้องไม่สามารถบรรลุเป้าหมายด้านรายจ่ายนั้นๆ ได้ เช่น แผนกการตลาด แผนกผลิต เป็นต้น สิ่งที่พูดมาข้างต้นคือส่วนหนึ่งของการทำงบประมาณ หรือที่เราเรียกว่าการทำ Budgeting นั่นเอง เชื่อว่าพอเฉลยมาถึงจุดนี้ทุกคนก็น่าจะร้อง อ๋อ มากขึ้น การจัดทำงบประมาณ (Budgeting) คืออะไร? การจัดทำงบประมาณ (ฺBudgeting) คือ การวางแผนรายได้-รายจ่ายล่วงหน้าเป็นตัวเลข ไม่ว่าจะอยู่ในรูปของตัวเงินหรือปริมาณ เช่น กำหนดเป็นจำนวนเงินบาท ปริมาณชิ้นที่ขายได้ หรือจำนวนครั้งที่ใช้ เป็นต้น ซึ่งตัวเลขจะถูกกำหนดตามรอบที่ใช้วัดผล เช่น เป็นรายเดือน รายไตรมาส รายครึ่งหรือ หรือรายปีก็ได้ ไม่ว่าจะวัดผลเป็นรายใดก็ตาม เมื่อครบกำหนดรอบการวัดผล ผู้บริหารจะต้องนำตัวเลขที่เกิดขึ้นจริงมาเทียบกับงบประมาณที่วางแผนไว้ว่าเป็นไปตามแผนที่วางไว้หรือไม่ ซึ่งอาจจะดีหรือแย่กว่าที่ประมาณการไว้ก็ได้ แต่ตัวเลขที่แตกต่างจากผลที่วางไว้ จะต้องหาสาเหตุให้ได้ว่าเกิดจากปัจจัยใดเพื่อวิเคราะห์สาเหตุและใช้ช่วยวางแผนในการจัดทำงบประมาณในครั้งถัดไปได้ 3 ขั้นตอนพื้นฐานในการจัดทำงบประมาณ 1. กำหนดตัวเลขที่อยากได้และเป็นไปได้ เริ่มจากกำหนดเป้าหมาย และกลยุทธ์ของกิจการก่อนว่าอยากไปไกลแค่ไหน เร็วแค่ไหน ด้วยวิธีอะไร เช่น ฝั่งรายได้ ถ้าอยากเติบโตเร็ว ต้องกำหนดเป้าที่ท้าทาย เช่น ยอดขายเพิ่มขึ้น 200-300% พร้อมกำหนดวิธีการที่จะทำให้ยอดขายเป็นไปตามที่กำหนดได้จริง 2. รู้ว่าอะไรที่ขับเคลื่อน (Driver) รายได้และรายจ่าย เช่น ยอดขายอาจถูกขับเคลื่อนด้วยจำนวนชิ้นของสินค้าที่ขายได้ หรือจำนวนตัวแทนจำหน่ายที่หาได้ในแต่ละปี ส่วนค่าใช้จ่ายอาจกำหนดจากจำนวนวัตถุดิบที่ควรใช้ในการผลิตสินค้า 1 ชิ้น หรือจำนวนต้นทุนค่ายิงโฆษณาต่อลูกค้า 1 คนที่หาได้ เป็นต้น สิ่งที่ควรรู้ คือ ตัวขับเคลื่อน(driver)รายได้และรายจ่ายของแต่ละประเภทธุรกิจมีไม่เหมือนกัน ไม่สามารถเลียนแบบของคนอื่นได้ แต่โดยทั่วไปในอุตสาหกรรมเดียวกันจะใช้ตัวขับเคลื่อนคล้ายๆ กัน เช่น ธุรกิจโรงแรมตัวขับเคลื่อนรายได้ คือ จำนวนห้องที่ลูกค้าใช้บริการ แต่ในธุรกิจขายสินค้า จะใช้จำนวนสินค้าที่ขายได้ เป็นต้น 3. ทบทวนภาพรวม เมื่อกำหนดตัวเลขประมาณการของรายได้และรายจ่ายเสร็จแล้ว ให้ทำการทบทวนว่ารายได้ที่กำหนดสอดคล้องกับรายจ่ายที่กำหนดหรือไม่ บางครั้งอาจพบว่าตั้งเป้ายอดขายจากจำนวนชิ้นที่ขายได้สูงขึ้นมาก แต่รายจ่ายด้านการขายและการตลาดเท่าเดิมหรือลดลง ทำให้เราอาจพบความไม่สอดคล้องระหว่างรายได้และรายจ่ายในบางกรณีได้ จริงๆ แล้วขั้นตอนการจัดทำงบประมาณแบบสมบูรณ์มีรายละเอียดที่เยอะกว่านี้มาก แต่ในซีรีย์บทความนี้เราเน้นเรื่องที่เป็นพื้นฐานสำหรับผู้ประกอบการมือใหม่ให้สามารถนำไปใช้ได้โดยง่ายและเข้าใจเร็วที่สุด จึงไม่ได้อธิบายขั้นตอนการจัดทำแบบละเอียดนั่นเอง ตัวอย่างงบประมาณการในระยะเวลา 1 ปี ในฝั่งรายได้ อาจจะไม่ค่อยมีความซับซ้อน เพราะมักมีรายได้หลักของกิจการประเภทเดียว ทำให้การประมาณการจะง่าย เช่น กำหนดเป็นยอดรายได้ที่ต้องการ หรือ% ที่เพิ่มขึ้นของแต่ละไตรมาส เป็นต้น สำหรับส่วนของรายจ่าย มักจะไม่สามารถกำหนดยอดประมาณการเป็นก้อนเดียวได้ เพราะรายจ่ายมีหลายประเภท และแต่ละประเภทจะมีตัวขับเคลื่อน(driver) ที่แตกต่างกัน การจัดทำงบประมาณ (ฺBudgeting) คือ การวางแผนรายได้-รายจ่ายล่วงหน้าเป็นตัวเลขสำหรับรอบระยะเวลาใดเวลาหนึ่ง เช่น ตัวเลขสำหรับรายได้ รายจ่ายที่ต้องทำได้ภายใน 3 เดือน 6 เดือน หรือ 12 เดือน การวางแผนตัวเลขล่วงหน้า จะช่วยให้การทำธุรกิจสนุก เพราะมีเป้าหมาย และจะหาวิธีเพื่อทำให้เป้าหมายนั้นบรรลุให้ได้ สุดท้ายเมื่อครบกำหนดรอบการวัดผล ผู้บริหารจะต้องนำตัวเลขที่เกิดขึ้นจริงมาเทียบกับตัวเลขที่วางแผนว่าเป็นไปตามแผนที่วางไว้หรือไม่ พร้อมหาสาเหตุว่าอะไรเป็นปัจจัยเชิงบวกและเชิงลบของตัวเลขเหล่านั้น เพื่อใช้ในการวางแผนงบประมาณในครั้งถัดไป สำหรับในตอนถัดไป เราจะคุยกันในเรื่องการใช้เงินให้ถูกประเภท เช่น เงินกู้ที่มาระยะสั้นเพียง 3 เดือน แต่บริษัทนำไปลงทุนก่อสร้างสินทรัพย์ที่ใช้เวลานาน 1 ปี หรือเงินที่กู้มาระยะยาวแต่ใช้สำหรับใช้จ่ายในระยะสั้น ดีหรือไม่ดี และจะส่งผลกระทบต่อการดำเนินงานของธุรกิจอย่างไรบ้าง เราจะมาไขคำตอบกันในตอนหน้า โปรแกรมบัญชีออนไลน์ PEAK ช่วยผู้ประกอบการจัดการบัญชีอย่างเป็นระบบ รองรับการเติบโต ช่วยให้ธุรกิจก้าวไปสู่ความสำเร็จ ทดลองใช้งานโปรแกรมบัญชี PEAK ฟรี! 30 วัน มูลค่า 1,200 บาทคลิก (ไม่มีค่าใช้จ่าย)PEAK Call Center : 1485LINE : @peakaccountสอบถามเพิ่มเติม คลิก

ความรู้บัญชี

PEAK Account

7

min

Update Function 11/12/2024

PEAK with the new function designed to enhance efficiency. ✨ 1. Developed the bank reconciliation function to enhance work efficiency and convenience. 1.1 Improved the display of information on the reconciliation page for better readability. 📢 For businesses using the bank reconciliation function, the system has been updated to enhance the display on the reconciliation page, allowing more information to be shown. The updates include: These improvements aim to boost efficiency and make data review more convenient and faster. 1.2 Ability to create new transactions directly from the reconciliation page. 📢 For businesses using the Premium, PRO Plus, and Trial packages, that perform bank reconciliation and need to make transactions, the system now offers additional options to create transactions directly from each deposit/payment entry. Users can click the options button (three dots) or right-click to perform actions immediately through the bank reconciliation page. The available options include: These features are designed to streamline document management and enhance efficiency in bank reconciliation processes. ✨ 2. Added the PEAK Payroll system to streamline payroll processing and reduce manual steps. 2.1 Add new employees directly on the payroll processing page. 📢 The system now includes an “Add New Employee” button on the payroll processing page. Users can conveniently add new employee information directly from the payroll page, streamlining the workflow and improving efficiency. 2.2 Adjust accumulated income calculations to be based on a cash basis. 📢 The system now adjusts the calculation of accumulated income displayed on payroll slips. It will calculate based only on payroll payment documents with a “Paid” status. Additionally, a notification has been added to the payroll payment page to inform users about the new calculation criteria. This enhancement ensures that the information is accurate and aligns more closely with the cash-based principle. Example of a Notification Regarding Cumulative Income Calculation. 2.3 Add the option “Income Type 40(2)” on the additional income adjustment page and display it in Form 50 Bis on the payroll summary page. 📢 The system now includes an option for income type 40(2) on the Additional Income page. Users can edit each additional income item by specifying whether it falls under income type 40(1) or 40(2). When generating the year-end payroll summary, the system will automatically pull the data and display income type 40(2) items on the Withholding Tax Certificate (Form 50 Bis) page. This enhancement ensures greater accuracy in managing tax data. Example of Form 50 Bis with income type 40(2). 2.4 Support displaying “Income Type 40(2)” in the tax submission file. (PND.1 Text File) 📢 The system now updates the tax filing Text File for P.N.D. 1 to support income type 40(2) in addition to 40(1). This improvement enables users to file taxes more conveniently and accurately by including both income types in the submission. Example of a Text File with income type 40(2). ✨ 3. Developed the functionality to apply deposit receipts/payments for settling more than one document. 📢 For businesses using deposit receipts/payments, the system now supports applying these documents to offset payment/receipt transactions. Users can choose to apply deposit receipts/payments in two ways: When selecting deposit receipts/payments for offsetting, users can modify the amount and related tax values. On the deposit details page, the system will display the number of deposit documents applied for offsetting, the applied amounts, and the remaining deposit balance for future use. For example, if a deposit receipt is issued and the customer makes partial payments in multiple installments, the system will accurately track these payments.This feature enhances convenience and flexibility in managing deposit receipts and offsetting payments, ensuring efficient financial operations. Example of Deposit Information Display on the Document Page. ✨ 4. Improved the Product/Service Import functionality to simplify data management. 4.1 Add the option “Update Existing Products” to modify current data. 📢 For businesses that need to modify product/service information already in the system, you can now import the “Edit Existing Products” file. This feature allows users to update product/service information efficiently, and the system will automatically update the records. The imported file consists of 3 Sheets: For the products/services you modify, the Product ID must match an existing ID in the system. If a product/service ID does not exist in the system, the file import will fail. This ensures accurate and seamless product/service data management, helping reduce errors and maintain operational efficiency. Example of the “Edit Existing Products” Import File. 4.2 Add new columns in the product/service import file to align with system data requirements. 📢 The system now clarifies the descriptions and required information for importing files, ensuring better accuracy and transparency. Additionally, the product/service import file now includes an SKU column for integration with popular platforms like Shopee, Lazada, and TikTok Shop. If you input an SKU from these platforms—even if it hasn’t yet been configured—the system will automatically activate the SKU upon import. To ensure smooth and efficient data management, the system limits imports to 1,000 items per batch. This helps prevent errors and ensures reliable handling of large datasets. ✨ 5. Improved the Contact Import functionality to make data management more convenient. 5.1 Add the option “Update Existing Contacts” to modify current data. 📢 For businesses that need to modify contact information already in the system, you can now use the “Edit Existing Contacts” import file. This allows users to efficiently update contact details, and the system will automatically refresh the contact information. The imported file is divided into 3 sheets: Contact ID: Must match an existing ID in the system for updates to work correctly. If the contact ID does not exist, the system will reject the file import. By requiring matching IDs, this ensures accurate and seamless management of contact information while minimizing errors. Example of the “Edit Existing Contacts” Import File. 5.2 Add new columns in the contact import file to align with system data requirements. 📢 The system now clarifies descriptions and specifies the required information for importing files to ensure better accuracy. Additionally, the import file for contacts now includes new columns for Contact […]

ฟังก์ชันใหม่แนะนำการใช้งาน